Introduction
Even on the free tier Cloudflare provides some great features to protect your website against attacks. But what if still want to use Fail2Ban to protect a login form or API for example? In this case Cloudflare needs to know the IPs in you fail2ban jail. Luckily Cloudflare has an API available which we can use to solve our problem. The required API is also available on the free Cloudflare tier, so you don’t have to worry about monthly subscription costs.
Fail2Ban Action Configuration
I will use my Seafile server in this example. This also works for any other Fail2Ban configuration. First, we need to start with the Fail2Ban action configuration. In the action.d folder you can already find a cloudflare.conf however this version is outdated and does no longer work. So, we head over to Github and get the updated version:
https://github.com/fail2ban/fail2ban/blob/master/config/action.d/cloudflare.conf
I will simply replace my local action, but you can of course create another one with a different name. After cloning the Cloudflare action you only must configure two parameters: cftoken, which is your global API token and cfuser, which is your Cloudflare accounts mail address.
[Init]

# If you like to use this action with mailing whois lines, you could use the composite action
# action_cf_mwl predefined in jail.conf, just define in your jail:
#
# action = %(action_cf_mwl)s
# # Your CF account e-mail
# cfemail  =
# # Your CF API Key
# cfapikey =

cftoken = YOURGLOBALAPIKEY

cfuser = YOURCLOUDFLAREMAIL

cftarget = ipAfter edition and saving the configuration file we can continue with the jail configuration.
Fail2Ban Jail Configuration
In you jail configuration add the following action:
action = cloudflare
    iptables-allports
Keep in mind that the action name depends on the name you defined in the Fail2Ban action configuration.
My complete jail configuration looks like this:
[seafile]

enabled  = true
port     = https
filter   = seafile-auth
logpath  = /opt/seafile/logs/seahub.log
maxretry = 3
action = cloudflare
    iptables-allports
Test your Fail2Ban Configuration
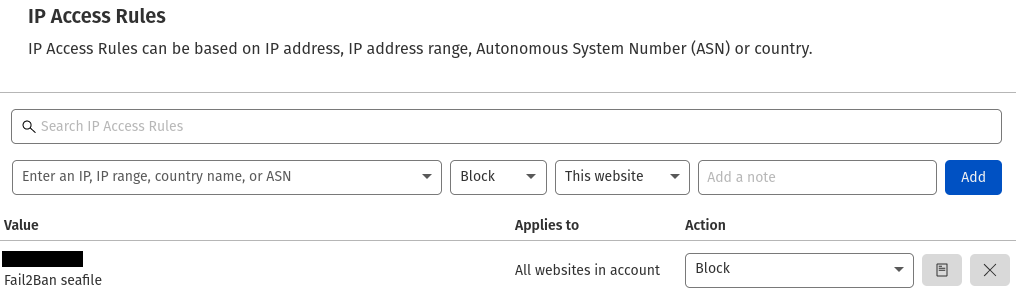
After you have triggered the Fail2Ban action you should find a new entry in you Cloudflare IP-Access-Rules list (Firewall -> Tools). You should find a new entry with your ip address and your jail name in the description. The API call configured in the cloudflare.conf will block the ip address for your whole Cloudflare account. That means the ip address will get blocked on all proxy enabled domains in your Cloudflare account.
You can still use unbanip to remove your ip address from your configured jail:
fail2ban-client get YOURJAILNAME actionunban YOURIPADDRESSConclusion
Using Fail2Ban with Cloudflare proxy enabled is pretty easy and completely free (at least until the date this post is published). So, what are you waiting for? Improve the security of your servers and services.