Introduction
After a successful installation of ISE and your first switch configuration you can finally create your first policy. We will create a policy which will only permit access from specific MAC addresses and will then dynamically assign the configured VLAN on the connected switch port.
General Information
ISE has a default policy which allows all connections. You can’t change the name of the default policy nor can you delete it, but you can change the policy settings. I suggest to you to use the default policy to deny all requests. So if no other policy matches the connection should be denied, equally to a standard firewall policy.
Edit Default Policy
Navigate to your default policy by selecting Policy -> Policy Sets. Use the arrow on the far right to view the policy. Open the Authentication Policy tab. This includes all allowed authentication methods for the selected policy set. We don’t have to change anything here for our default policy.
Close it and move on to Authorization Policy tab. Policies with a green checkmark are enabled and the one with a cross are disabled. You have two options here, you can either disable the policies or delete them. To get a better overview of all my policies I will delete all unnecessary ones.
Delete Policies
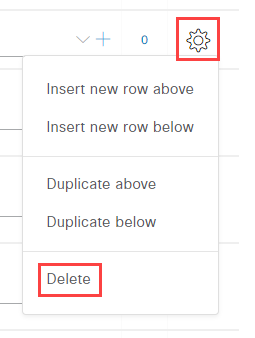
To delete a policy select the gear icon under actions and select delete:
I will delete all policies except the default one (can’t be deleted anyway). Once you have deleted or disabled all policies hit save and confirm. Your policy set should now look similar to this one:
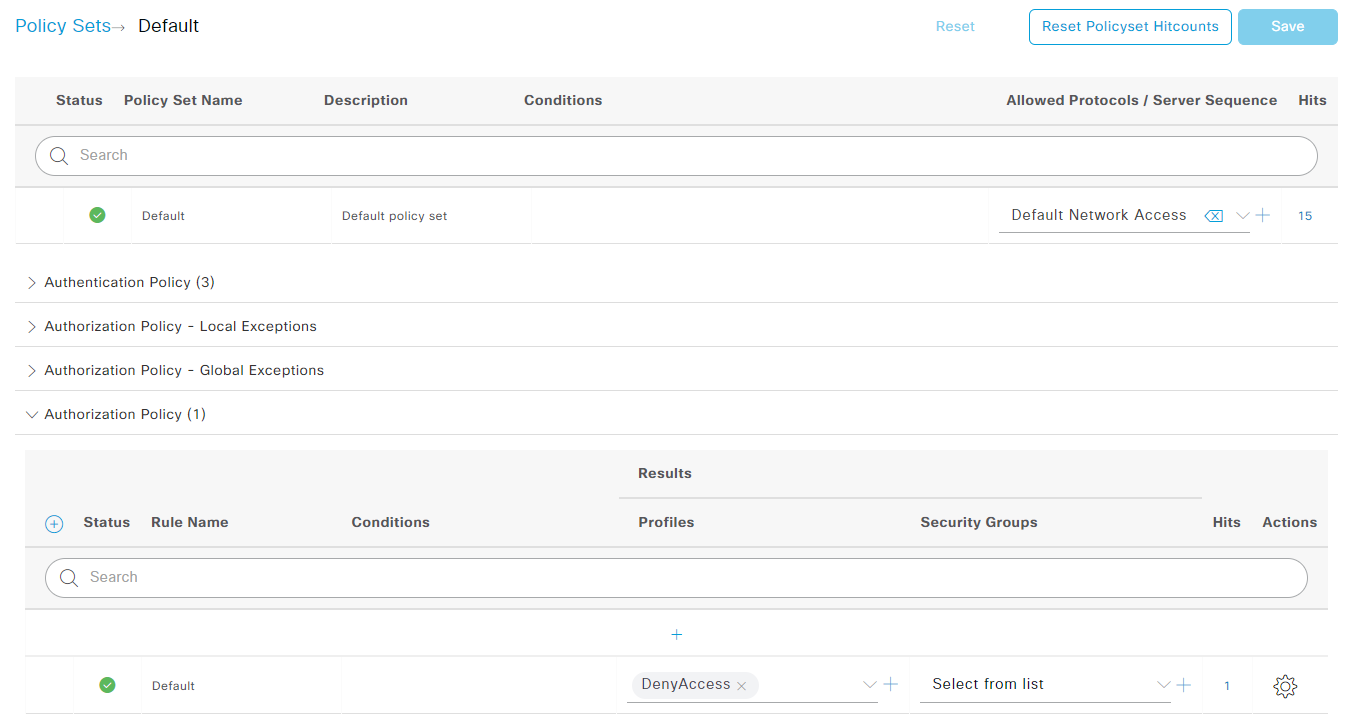
Check if the default policy is set to DenyAccess like in the screenshot above. Now all every new client connection should be denied.
Test Default Policy
Let’s do a quick test if everything works as expected so far. Connect a client to check if our new policy is working. Navigate to Operations -> Live Logs. You should see a new entry marked with a red cross and an access deny message.

Create MAB Group
In order to use MAC Authentication Bypass (MAB) in our policy sets we first need a group to save those mac addresses.
Navigate to Administration -> Identity Management -> Groups and select Add.
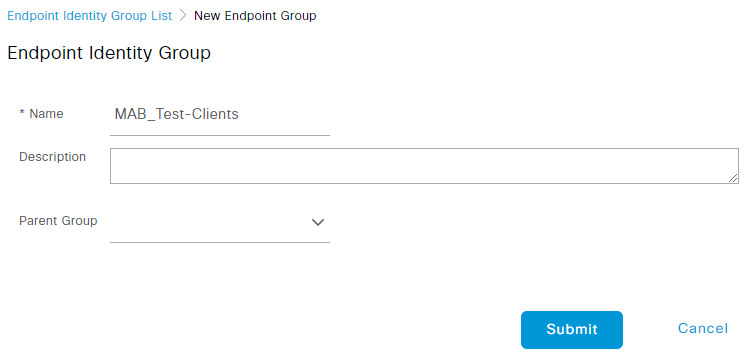
Give the group a name and description (optional) and click Submit:
Add Endpoint to Group
There are multiple ways to add endpoints to the new group. The path to choose depends on if the endpoint is known or unknown by ISE. Once an endpoint was connected through a switch port configured for ISE it is automatically know by ISE.
Known Endpoints
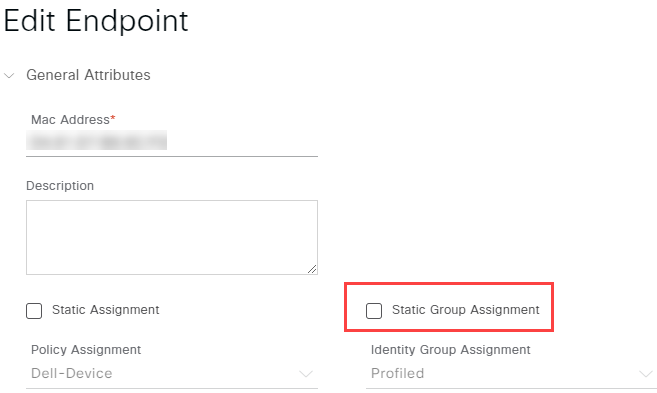
If you have already connected the endpoint to ISE (doesn’t matter if the authentication was successful or not) you can find it in the endpoints section. Navigate to Context Visibility -> Endpoints. Select the endpoint you want to add to the group. Use the pencil icon to edit the endpoint settings. Check Static Group Assignment and Select your identity group:
Another option is to select your group Administration -> Identity Management -> Groups. Select Endpoint Identity Groups on the right and choose your group. In the next windows you can select Add and choose your endpoint from the dropdown menu. After selecting your endpoint the settings are automatically saved.
Unknown Endpoints
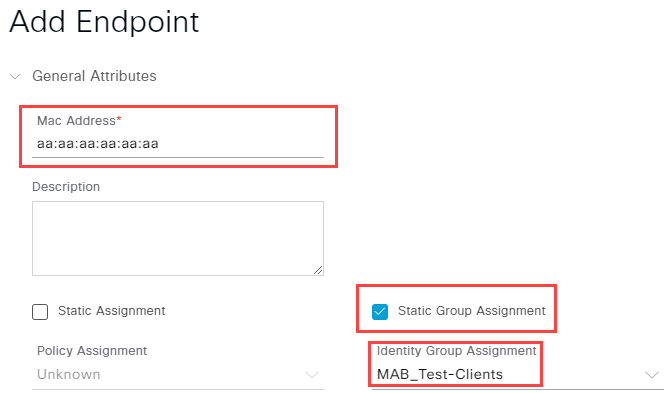
If your endpoint is not yet know by ISE you have to option to manually add it. To do so navigate to Context Visibility -> Endpoints and click on the + icon to add a new endpoint.
Enter its MAC address and select your identity group after checking the Static Group Assignment box. Confirm by clicking Save:
Create Dynamic VLAN Profile
In order to assign VLANs dynamically we need to create a new profile. This ensures that the VLAN configuration will only be added to the switch port once a client is connected and is removed if the client disconnects.
Navigate to Policy -> Results -> Authorization -> Authorization Profiles and select Add. Name the policy and set your VLAN ID by selecting Common Tasks -> VLAN. Enter your VLAN ID/Name. Confirm by clicking Submit:

Create new Policy Set
Add new Policy Set
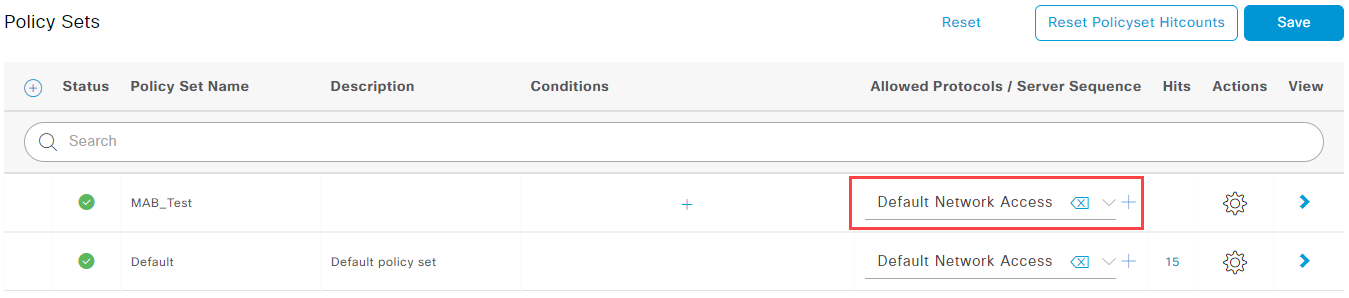
Navigate to Policy -> Policy Sets again and select the + icon above your Default policy.
Give your policy a name and select Default Network Access on the Allowed Protocols / Server Sequence column:
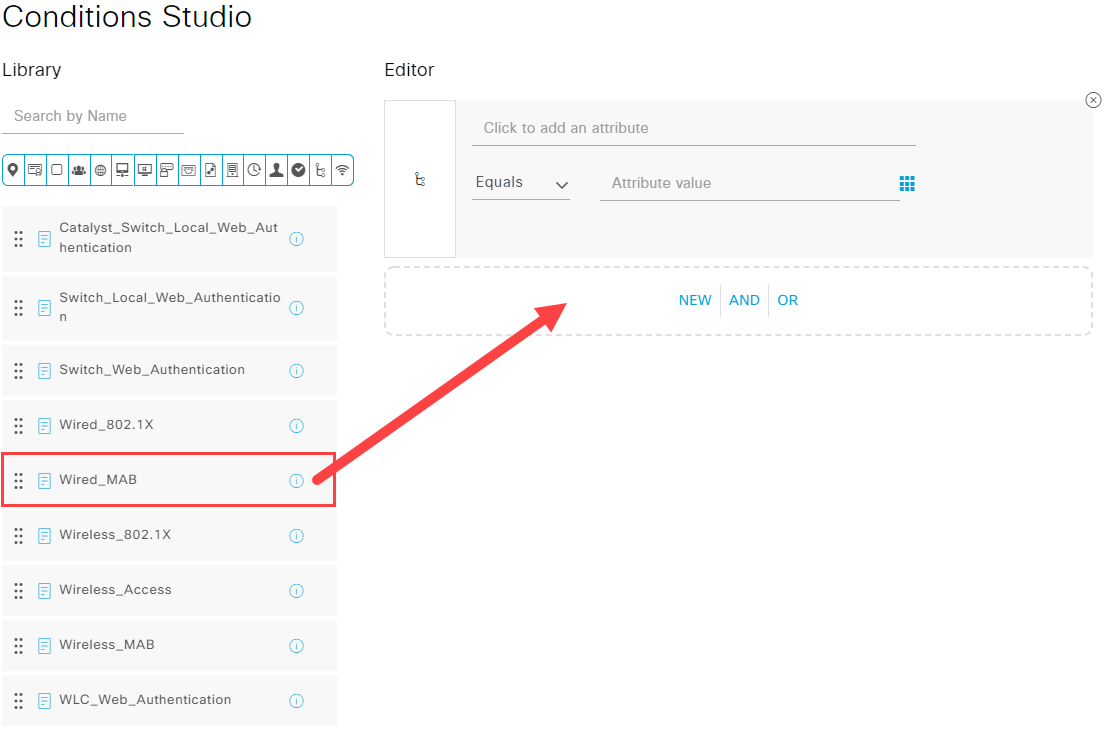
Click on the + icon on the Conditions column. In the Conditions Studio screen drag and drop the Wired_MAB condition into the Editor field and confirm with Use:
Save your new policy set with the Save button. Select your policy by clicking on the arrow on the right.
Edit Authentication Policy
This step is optional as the default authentication policy will allow access to our internal endpoints. For better visibility in Live Logs I will create a new one.
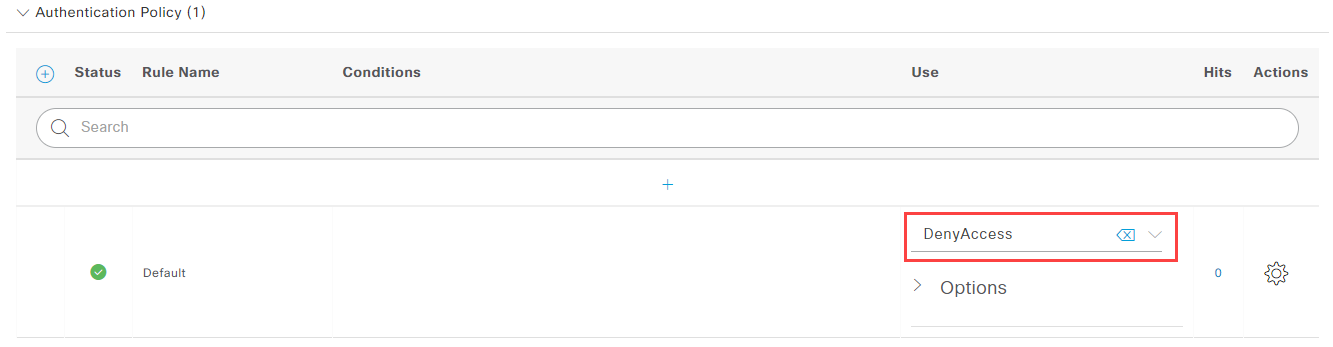
If you want to customize your policy start by selecting DenyAccess for your default policy:
Use the + icon above to create a new rule. Name it and select Internal Endpoints. Click on the + icon on the Conditions column. In the Conditions Studio screen drag and drop the Wired_MAB condition into the Editor field and confirm with Use
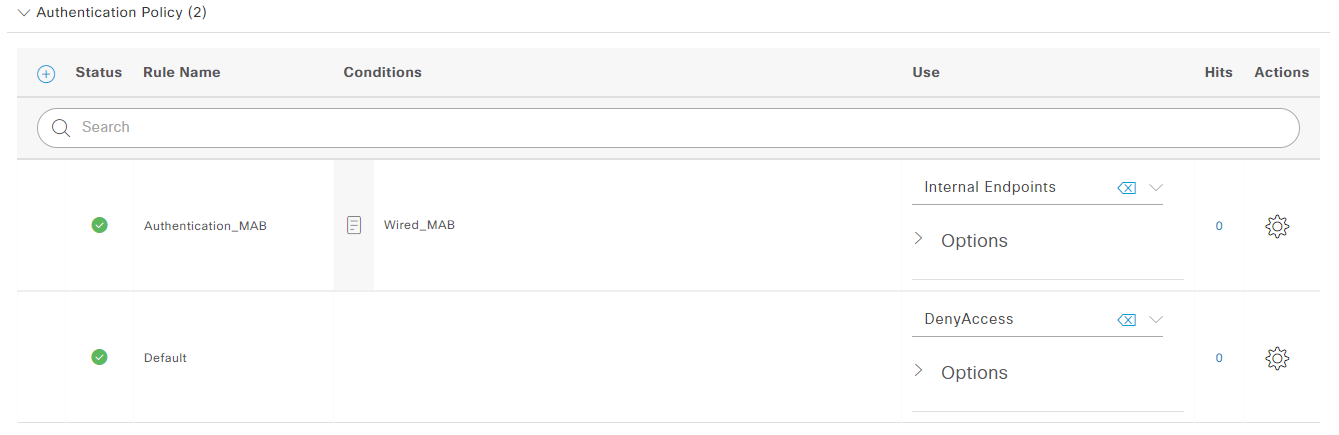
If you want you can hit the Save button now, so that you don’t lose and progress by accident. Your policy should now look similar to this one:
Edit Authorization Policy
Now we can move on to the Authorization Policy tab. The default profile should already be set to DenyAccess.
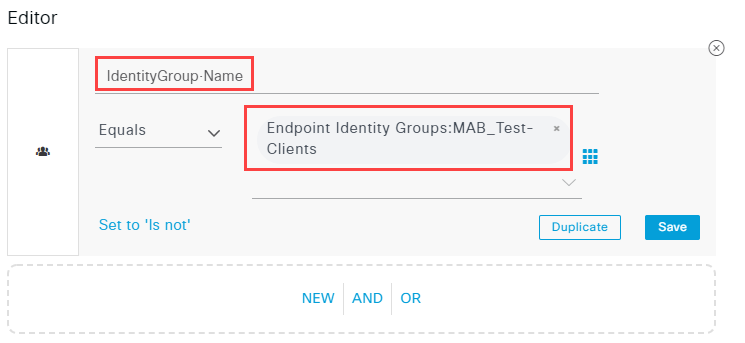
As always use the + icon to add another policy. Give your rule a name and click on the + icon again on the Conditions column. Click on the Click to add an attribute field and navigate to Identity group in the new window. Select IdentityGroup Name:

Select your identity group in Choose from list or type field. You can also search for your group name. Confirm with Use:
In the Profiles column select the profile you created earlier. I called my example Permit_VLAN_10. Your authorization policy should now look similar to mine:

Now every client which MAC address is in the MAB_Test-Clients group gets access VLAN 10 added to the active port and the access is permitted.
Use the Save button to activate your policy.
Test Policy Set
Last but not least we need to test the policy. To do so navigate to Operations -> Live Logs and connect your client. You can also adjust the refresh interval, max entries and time period to your liking:

Once you have connected your client it should match our authentication and authorization policy:

Switch Session
Use the following command to view sessions details for a specific switch port. In my case GigabitEthernet1/0/1:
show authentication sessions interface GigabitEthernet1/0/1 details
The output should look like the following:
            Interface:  GigabitEthernet1/0/1
          MAC Address:  d481.d7aa.aaaa
         IPv6 Address:  Unknown
         IPv4 Address:  192.168.1.11
            User-Name:  D4-81-D7-AA-AA-AA
               Status:  Authorized
               Domain:  DATA
       Oper host mode:  single-host
     Oper control dir:  both
      Session timeout:  N/A
      Restart timeout:  N/A
Periodic Acct timeout:  300s (local), Remaining: 254s
       Session Uptime:  46s
    Common Session ID:  C0A863030000001731FF4616
      Acct Session ID:  0x0000000D
               Handle:  0x43000006
       Current Policy:  POLICY_Gi1/0/1

Local Policies:
        Service Template: DEFAULT_LINKSEC_POLICY_SHOULD_SECURE (priority 150)

Server Policies:
           Vlan Group:  Vlan: 10

Method status list:
      Method            State

      mab                Authc Success
This give us a lot of information about the current session. The most important one is the Status which is Authorized. We can tell that the Domain is DATA. Another option here would be VOICE for VoIP phones. You can also tell the endpoints Session Uptime which is only 46 seconds in my example. The selected Vlan Group is also shown which is Vlan 10. Another useful information is the authentication method which is mab in our case. 802.1x would be another method we could use but we only configured MAB so far.
Switch Port
If you look at the interface status after a successful authentication you can also see the assigned VLAN there. Use the following command to do so:
show interface status
The switch port Gi1/0/1 is now assigned to VLAN 10:
Port      Name               Status       Vlan       Duplex  Speed Type
Gi1/0/1                      connected    10         a-full a-1000 10/100/1000BaseTX
The VLAN configuration gets removed and set to default (VLAN configured on the switch port) once you disconnect the client:
Port      Name               Status       Vlan       Duplex  Speed Type
Gi1/0/1                      notconnect   999          auto   auto 10/100/1000BaseTX
Tips and Ticks
Reauthenticate or Terminate Endpoint Session
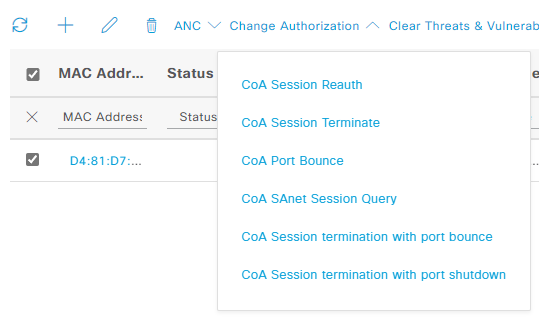
From time to time it can be useful to reauthenticate or terminate an endpoint’s session to ISE. For example significant change in policies or settings may require a reauthentication. To do so navigate to Context Visibility -> Endpoints. Select the endpoint you want to reauthenticate and navigate to Change Authorization -> CoA Session Reauth (CoA is short for Change of Authorization). You can also terminate a session completely by using CoA Session Terminate:
By clicking on the endpoint you get an overview of all the information that ISE has collected or was assigned manually.
Live Logs and Live Sessions
I already mentioned Live Logs a couple of times in this guide but since they are pretty important I would like to refer to them again. Every connection through ISE is visible in Live Logs. They offer a big variety of authentication and authorization details, so it’s your first point of contact for debugging endpoint problems. Active sessions can be monitored in the Live Sessions tab.
Viewing Logs older than 24h
Live Logs only show up to 24 hours of logs. To access older log files navigate to Operations -> Reports -> Reports -> Endpoints and Users -> RADIUS Authentications. In the Reports section you can access logs up to 30 days old.
Conclusion
This was quite a journey, but you are finally done with your ISE setup for further labbing and testing. ISE offers a large variety of configuration options for all kinds of use cases. I hope that I was able to give you an introduction and some ideas on where to start.